Common Crane Repair Questions

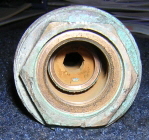
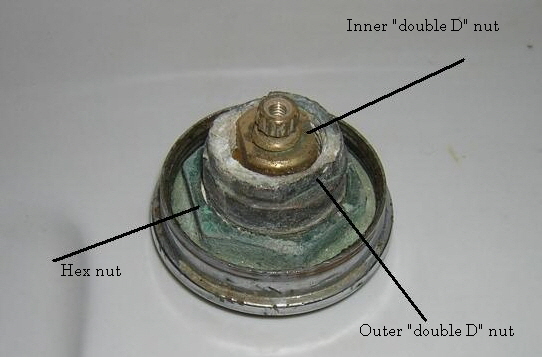
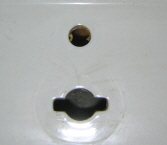
The Dial-ese cartridge was ahead of it’s time in the fact that it did not use a separate removable seat in the valve. There is a seat, it’s simply part of the cartridge. When the faucet is opened to allow water to pass, the center part of the cartridge comes down away from the rubber seal. Over time, the center brass portion tends to get scored by the water passing (think erosion) and then the seal will no longer do just that. A rebuild kit only renews the rubber parts, not the brass, and that’s usually what’s wrong. One can determine if this is the case by following the example in the picture. If the tapered surface is rough in any way, it’s shot. This problem is solved by installing a new cartridge. They’ll be good for 30 years or so, the rebuild kits, a couple of years….

Crane Dial-ese cartridge

Okay, okay, you got us, we agree, it does look like a seat. Here’s the difference. A seat has a rubber washer that actually moves and presses against it, and this shuts off the water. In the Dial-ese application, the end of the cartridge presses against that “stop” in the valve body, and never moves. Yes, the seal is made using rubber, but once the two meet when the cartridge is installed, they’re never moved again.

This being said, yes, the stop is removable. In about 1 % of all our repair jobs, excessive water acidity actually ate away the sealing surface of the stop. (I’ve replaced 2 in seven years) We can order them, but we’ll need to know the length as there are 6 different lengths. Basically, if it ain’t chipped, don’t fix it!

Dial-ese Stop Close-up

Boy, these aren’t the most intuitive valve made, are they? Wait, put the hacksaw down!!! First, put a crescent wrench (or, if you do a lot of these, our #20-38 Dial-ese tool) on the outer “double D” nut. Turn counterclockwise. This might be tough as it presses against a cork or rubber seal. Once this is removed, put the same wrench on the inner “double D”. Also turn counter-clockwise. This is the cartridge. Assembly is the reverse of above.
Occasionally, the entire valve assembly will spin in these sinks. (insert expletive here). This is where the hex nut comes into play. Now, you’ll have to remove the trim ring to get to the hex nut. Then, with one wrench on the hex nut and another on the outer Double D nut, turn the outer counter-clockwise. The rest will be the same as above. The only problem you’ll be up against now is the seals to the ceramic sink are now shot, and you’ll have to replace them as well. This is done by removing the supply lines, and then the locknut from under the sink. Once the locknut is removed, the entire valve body will come out of the top of the sink. Use our # 15-VBS as a replacement seal, and assembly is the reverse of removal.

Dial-ese top

Crane used a different method of getting water to their spouts. They used a separate tube in the rear of the spout to get water in to it. Over time, the brass used in the manufacturing of this tube crystallizes and develops pinholes in the threads. We got tired of making these tubes every time we had a bad one, and now we have a supply of them. The number is 15-CMT. Click on the part # to be taken to the parts page.

Pre-war Crane Spout

First off, we have a saying around here, “You have to be a engineer to work on Crane sinks”. Usually, there are some more expressive words inserted in that sentence. Next, you have to remember that these spouts were factory-installed using specialized tools and were never intended to be serviced by the customer. That being said, the prewar spouts are fairly easy to remove. Unscrew the nut, the hidden keeper will slide up out of the keyhole slot, remove the supply nut off the tee in back, and lift the spout off. Reassembly, can be tricky, often you have to use your fingers to hold the hidden keeper at a 90 to the keyhole. Crane used a special tool for this, they do not exist anymore.

Crane Keyhole Detail

Still confused? We have a new page detailing the complete disassembly and reassembly of a Post-WW2 Crane Diana lavatory sink with step-by-step instructions and pictures. Click here to go to that page.

Even the good folks at Crane Plumbing company send us people who have Crane plumbing fixtures made before 1970 or so. We’ve personally been inside most of the Crane fixtures made between the 1920’ to the 1970’s. If you have any questions that have not been answered by this page, feel free to contact our plumbers at [email protected]. We appreciate the desire to keep those old bathrooms original, and we’ll be happy to help you in your endeavor to do the same!